

Set up automatic capture and revoke a device
Create a token, install the iPhone shortcut or the Android automation so your payments come in on their own, check that they're arriving, and revoke a token whenever you need to.
Every payment you make with your card or Apple Pay will land in your week on its own, without opening the app, and you'll know how to check that it's working and how to cut off a phone's access.
- A signed-in Monuvia session and an internet connection to create or revoke tokens.
- An iPhone with iOS 17 or later and the Shortcuts app (with your card added to Wallet), or an Android phone with an automation app like MacroDroid.
- Your phone does the capturing: it forwards the amount and the merchant to Monuvia after each payment. Monuvia never touches your bank or sees your accounts.
Automatic capture doesn't connect Monuvia to your bank. What actually happens is that your own phone, after each payment, sends Monuvia only the amount and the merchant. On iPhone, an Apple shortcut triggered by Apple Pay does this; on Android, an automation reads the purchase notification you receive and forwards that text. Monuvia never sees your accounts or your passwords.
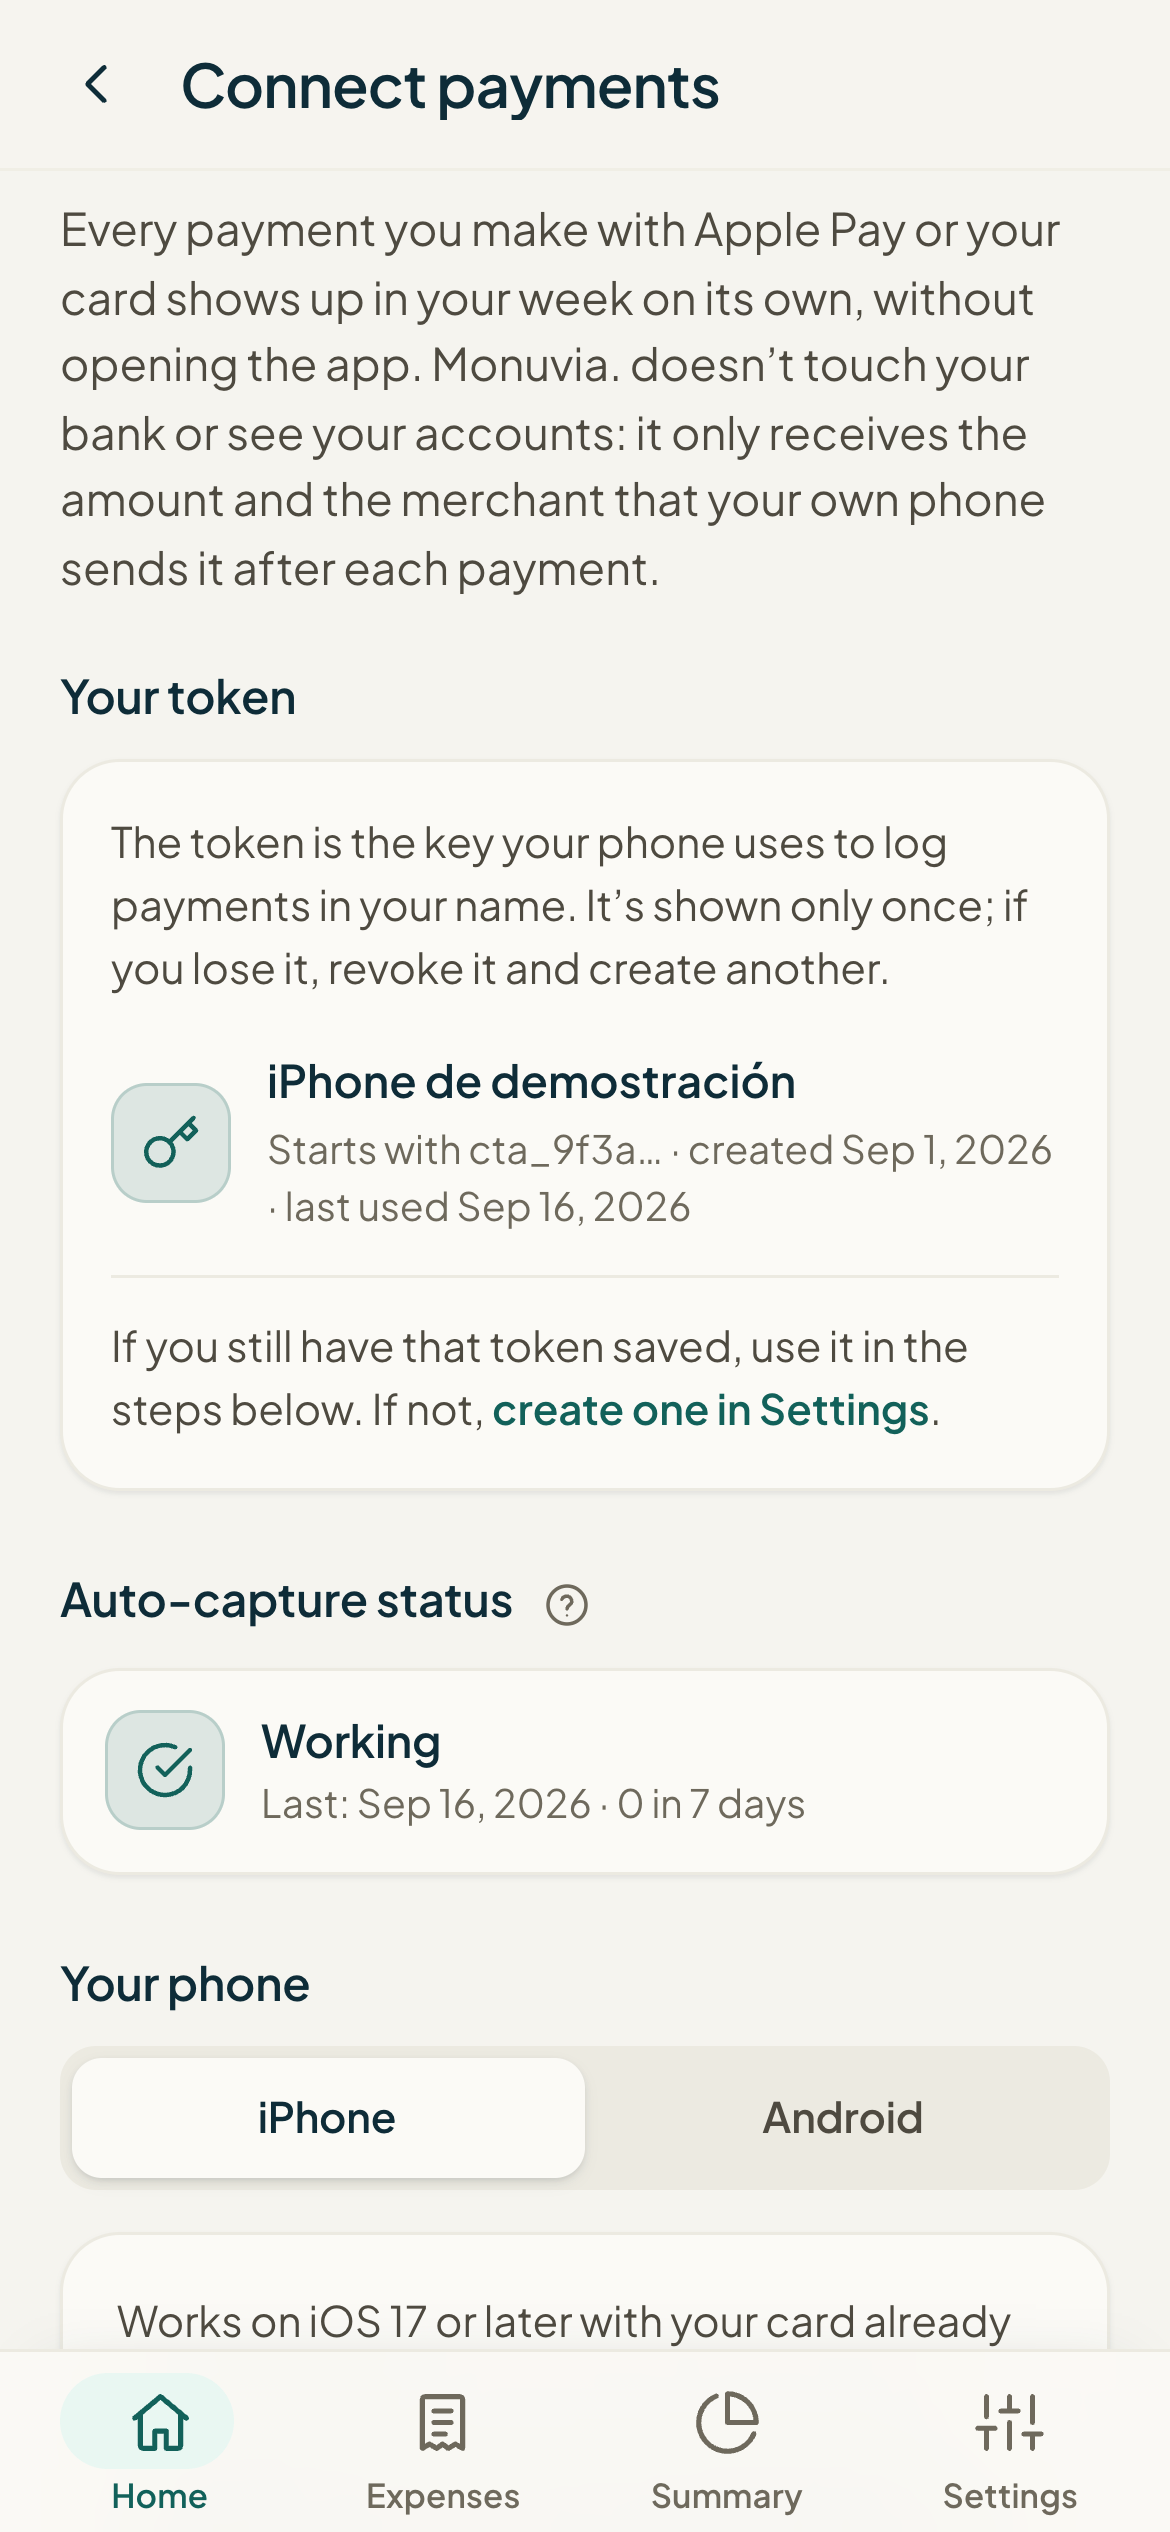
#1. Create your token
The token is the key your phone uses to log payments in your name. It's shown only once: copy it and save it right then. If you lose it, you can't see it again; just revoke it and create another.
- Open Connect payments.
- Under Your phone, choose the iPhone or Android tab, whichever is yours.
- If you don't have one yet, tap Create token for iPhone (or Create token for Android). You can also create it from Settings, in the Automatic tracking section, with the Create token button.
- When the token appears, tap Copy and save it. You'll see the notice "Save it now: it won't be shown again."
- Tap Close once you've copied it.
#2. Set up capture on your phone
iPhone/iPad
- On the iPhone tab, tap Download the "Log payment" shortcut and open it from your iPhone.
- When you add it, Shortcuts asks where to paste the token: paste the token you copied there. It's saved inside the shortcut and won't be asked for again.
- Open the Shortcuts app and go to the Automation tab.
- Tap New Automation (or the + at the top right if you already have others).
- In the triggers, tap Transaction (in iOS 26 it may appear as Wallet).
- Check the card or cards you want to log; leave Categories and Merchants unfiltered.
- Choose Run Immediately (not "Run After Confirmation") and tap Next.
- Find and tap the Log payment shortcut and tap Done.
- Test it: make a contactless payment with that card. You'll see a Monuvia notification like "Logged $12.50 at Super 99 · Groceries. Available this week: $184.30."
Android
- Install MacroDroid and grant it Notification access when it asks.
- Copy the token from the Android tab: you'll paste it into the request.
- In MacroDroid, tap Add Macro.
- Trigger: + → Notification → Notification Received → Select Application(s) and check your bank's app and/or Google Wallet. In the text filter, choose Contains and type a word that only purchase alerts include (for example "compra" or "B/.").
- Action: + → Connectivity → HTTP Request, with Request Method POST and the URL shown on screen (it ends in /rpc/registrar_notificacion).
- Under Header Parameters, add the apikey header with the key shown and Content-Type with application/json.
- Under Content Body, paste the text shown on screen and replace TU_TOKEN with your token.
- Name the macro "Log payment", save it, and turn it on.
- Test it: pay for something with your card and wait for the bank notification. The only thing that travels is that notification's text.
#3. Check that it's arriving
In Connect payments, the "Auto-capture status" card tells you whether it's working. In green, you'll see "Working" with the date of the last payment and how many arrived in the last 7 days. If none has come in for over a week, "No recent automatic payments" appears with a list of things to check.
- On iPhone: that the Transaction automation is still on, with Run Immediately.
- On Android: that the macro is still on and that MacroDroid has Notification access.
- That the pasted token is the current one; if you lost it, create another and paste it again.
- Make a small test payment and come back to this screen.
#Revoke a device
Revoking a token cuts off that phone's access. Do this if you switch devices, if you lost the token, or if you think someone else has it.
- Open Settings and go to Automatic tracking.
- Find the token by its name and its last-used date.
- Tap Revoke next to that token and confirm in the prompt "Revoke the token…? The shortcut that uses it will stop working."
- If you want to keep capturing from that phone, create a new token with Create token and paste it again into the shortcut (iPhone) or the HTTP request (Android).